gluten free snacks: Best 10 for Quick Healthy Bites
gluten free snacks have taken center stage in kitchens everywhere, and for good reason! Imagine biting into a treat that’s both crunchy and flavorful, delivering a burst of energy while satisfying your hunger. These quick, healthy bites are perfect for busy mornings, hectic afternoons, or even as an evening pick-me-up. I still remember the first time I made these snacks on a relaxed Sunday afternoon—their delightful blend of textures and natural flavors instantly lifted my spirits, and my family couldn’t get enough. With a perfect mix of wholesome ingredients, these [gluten free snacks] strike an ideal balance between health and taste.
What makes this recipe truly special is its simplicity. In just a few minutes of prep and a short time in the oven, you have a batch of delicious, guilt-free treats that can easily rival some of our other popular recipes. If you’ve loved our famous avocado toast, you’re in for a treat. While avocado toast boasts creamy richness and a velvety texture, these [gluten free snacks] bring a satisfying crunch with a medley of flavors that enhance every bite. They’re a testament to how easy healthy eating can be without sacrificing taste.
These snacks are designed to cater to every lifestyle—whether you’re seeking a quick bite on the run, a nutritious option for your lunchbox, or a creative addition to your family’s snack time. The recipe’s flexibility means you can adjust flavors to suit your palate, and every batch offers a new opportunity to experiment in the kitchen. So, preheat your oven, gather your ingredients, and join me on this culinary adventure where every bite is a celebration of health and flavor!
Table of Contents
What is [gluten free snacks]?
Have you ever wondered what exactly sets [gluten free snacks] apart from ordinary snacks? Well, it’s not just about avoiding gluten—it’s about embracing a lifestyle that values both taste and wellness. These treats are crafted with care, ensuring that every ingredient is free from gluten while still delivering a delicious and satisfying crunch. They’re perfect for those who are gluten-sensitive or anyone looking to add a lighter, healthier option to their snack repertoire.
Imagine a snack that’s as versatile as it is tasty—a mix of almond flour, oats, and a dash of natural sweetness, blended with the right balance of spices. Sounds intriguing, doesn’t it? The concept behind [gluten free snacks] is simple: you don’t have to compromise flavor for health. In fact, these snacks are designed to be a celebration of wholesome ingredients that work together to create a delightful eating experience. As the saying goes, “the way to a man’s heart is through his stomach,” and these snacks certainly prove that point by combining nutrition with irresistible taste.
The name [gluten free snacks] carries a bit of a fun backstory too. It all began with a quest to create a snack that would not only meet dietary needs but also please every member of the family. After countless experiments and taste tests, we discovered a formula that was both creative and crowd-pleasing. So, the next time you reach for a snack, think of these [gluten free snacks] as a tasty invitation to explore a healthier way of eating. Give them a try, and let your taste buds be the judge!
Why You’ll Love This gluten free snacks recipe
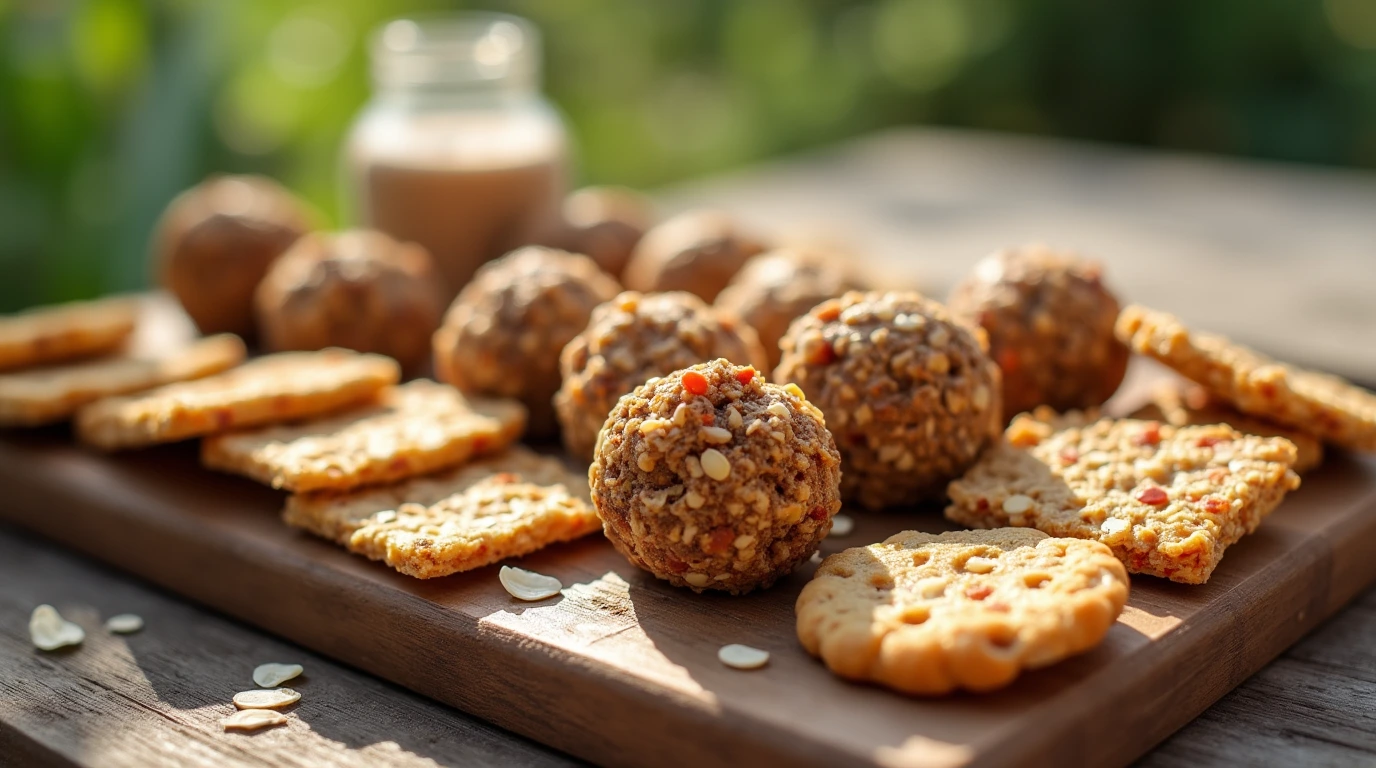
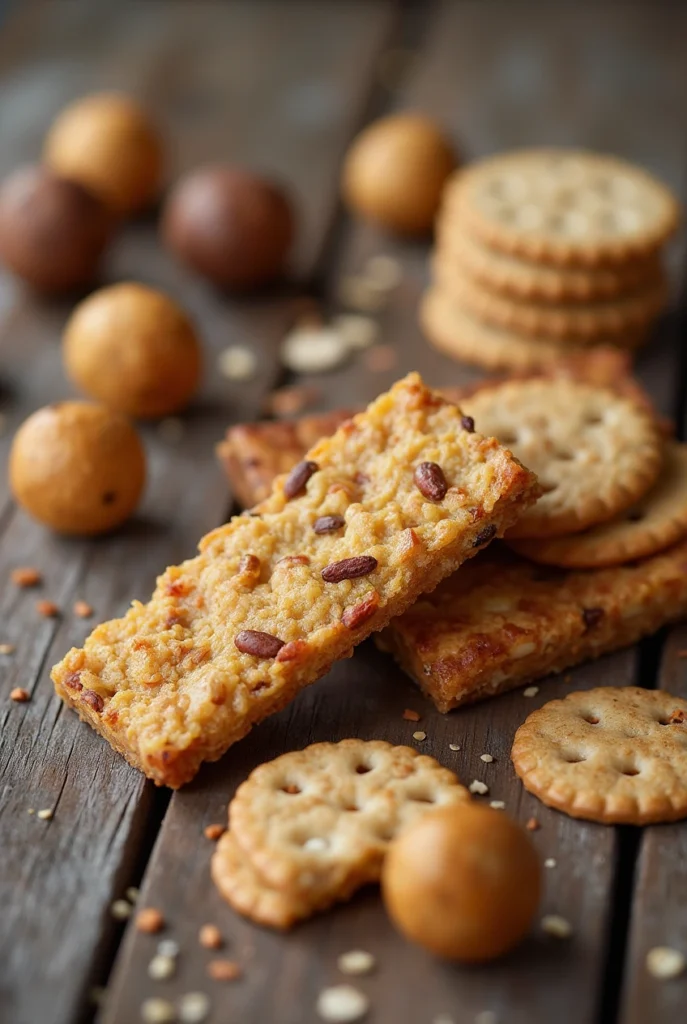
There are plenty of reasons to fall in love with these [gluten free snacks]. First and foremost, they offer an exceptional blend of flavors and textures. The base recipe combines nutty almond flour, hearty gluten-free oats, and a mix of natural sweeteners and spices that create an irresistible crunch with every bite. Whether you’re in the mood for something slightly sweet or savory, these snacks provide endless possibilities for customization.
Another significant advantage is the cost-saving benefit of making them at home. Instead of spending money on expensive pre-packaged gluten-free snacks, you can create a batch using ingredients you likely already have in your pantry. This not only saves you money but also gives you full control over the nutritional content and flavor profile of each bite. Compared to our other homemade recipes, such as our signature granola bars, these [gluten free snacks] offer a lighter yet equally satisfying option that’s perfect for any time of day.
Finally, the opportunity to add your own twist with various toppings and mix-ins makes these snacks truly special. Whether you’re sprinkling in dried cranberries, chia seeds, or a drizzle of honey, every batch becomes uniquely yours. The recipe even invites you to experiment with additional flavors, ensuring that you always have a new twist to enjoy. So, why not dive in and try these snacks at home? Embrace the creativity, enjoy the cost savings, and most importantly, savor every delicious bite!
How to Make gluten free snacks
Quick Overview
Creating your own [gluten free snacks] is a breeze. In just around 20 minutes of active preparation and a short baking session, you can have a batch of these crunchy delights ready to enjoy. The recipe is straightforward, making it accessible even for those with minimal kitchen experience. The simplicity of the process, combined with the flexibility to adapt flavors, means that you can tweak the recipe to suit your taste every time. Whether you’re aiming for a sweet treat or a savory snack, the foundation remains delightfully easy to work with. Let’s dive into the details!
Key Ingredients for [gluten free snacks]
Before you begin, gather these essential ingredients:
- 1 cup almond flour
- ½ cup gluten-free rolled oats
- ¼ cup coconut flour
- ⅓ cup unsweetened applesauce
- ¼ cup honey or maple syrup
- 2 large eggs (or flax eggs for a vegan option)
- ½ teaspoon gluten-free baking powder
- ¼ teaspoon salt
- ½ teaspoon cinnamon (optional, for a sweet version)
- 1 teaspoon dried herbs (optional, for a savory version)
- ⅓ cup chopped nuts (almonds, walnuts, or pecans)
- ¼ cup dried fruits (cranberries, raisins, or chopped apricots)
- 2 tablespoons chia seeds or flaxseeds
IMAGE: A high-quality image showcasing all the key ingredients for [gluten free snacks]. This visual guide ensures you know exactly what to look for at the grocery store and helps you prepare your pantry for a fun cooking session.

Step-by-Step Instructions
Below are 10 variations of our [gluten free snacks] recipe. Each variation offers a unique flavor profile while keeping the process simple and enjoyable.
1. Almond Butter Energy Bites
- Preheat your oven to 350°F (175°C).
- In a bowl, combine almond flour, oats, coconut flour, and baking powder.
- In a separate bowl, whisk together applesauce, honey, and eggs.
- Mix the wet ingredients into the dry until just combined, then fold in chopped nuts and a tablespoon of almond butter.
- Scoop small portions onto a lined baking sheet and flatten them slightly.
- Bake for 12-15 minutes until the edges turn golden. Allow cooling before serving.
2. Savory Herb Crackers
- Preheat your oven to 375°F (190°C).
- Pulse almond flour, oats, coconut flour, and salt in a food processor until finely ground.
- Whisk together eggs with a splash of water, then mix into the dry ingredients.
- Stir in dried herbs such as rosemary or thyme and a pinch of black pepper.
- Roll the dough between two sheets of parchment paper until it’s thin, then cut into your favorite shapes.
- Bake for 10-12 minutes until crisp.
3. Sweet Cinnamon Oat Bars
- Set your oven to 350°F (175°C).
- In a bowl, combine almond flour, gluten-free oats, coconut flour, cinnamon, and baking powder.
- Add applesauce, honey, and eggs, stirring until smooth.
- Fold in dried cranberries and chopped nuts.
- Pour the mixture into a greased baking pan and bake for 20-25 minutes.
- Once cooled, cut into bars for a portable, healthy snack.
4. Crunchy Chia Seed Bites
- Preheat your oven to 350°F (175°C).
- Mix almond flour, oats, and coconut flour with chia seeds and a pinch of salt.
- Blend in applesauce, honey, and eggs until a sticky dough forms.
- Scoop small bite-sized balls onto a baking sheet.
- Bake for approximately 15 minutes, then let cool for a crunchy texture.
5. Nutty Fruit Fusion
- Preheat your oven to 350°F (175°C).
- In a bowl, mix almond flour, oats, coconut flour, baking powder, and salt.
- Stir in applesauce, honey, and eggs until well combined.
- Gently fold in a mix of chopped nuts and dried fruits.
- Spoon the mixture into muffin tins lined with paper cups.
- Bake for 18-20 minutes until the bites are set.
6. Zesty Lemon Poppyseed Bites
- Preheat your oven to 350°F (175°C).
- Combine almond flour, oats, coconut flour, 1 tablespoon of poppyseeds, and a pinch of salt.
- In another bowl, whisk eggs with honey and freshly squeezed lemon juice.
- Mix the wet ingredients with the dry, adding lemon zest for an extra zing.
- Drop spoonfuls onto a baking sheet and bake for 12-15 minutes.
7. Chocolate Avocado Treats
- Preheat your oven to 350°F (175°C).
- In a bowl, mix almond flour, oats, and a tablespoon of cocoa powder with baking powder and salt.
- Mash a ripe avocado and blend it with honey and eggs until smooth.
- Combine the wet and dry mixtures and fold in a handful of chopped nuts.
- Spoon onto a lined tray and bake for 15 minutes.
- Cool before indulging in these fudgy treats.
8. Spicy Black Bean Bites
- Preheat your oven to 375°F (190°C).
- Blend almond flour with a bit of oats, cumin, and chili powder.
- In another bowl, mash black beans and mix with eggs and a little water.
- Combine both mixtures and stir in finely chopped bell peppers and onions.
- Form small patties on a greased baking sheet and bake for 15-18 minutes.
9. Coconut Mango Crunch
- Preheat your oven to 350°F (175°C).
- Mix almond flour, coconut flour, oats, a pinch of salt, and baking powder.
- Blend in eggs, honey, and a splash of coconut milk.
- Fold in diced dried mango and shredded coconut.
- Press the mixture into a baking tray, bake for 20-25 minutes, and then cut into squares.
10. Protein-Packed Quinoa Bites
- Preheat your oven to 350°F (175°C).
- In a bowl, combine almond flour, oats, and cooked quinoa.
- Add eggs, a bit of honey, and a pinch of salt, stirring until mixed.
- Stir in your favorite seeds, such as pumpkin or sunflower, along with chopped nuts.
- Scoop small mounds onto a lined sheet and bake for about 15 minutes.
Each variation allows you to experiment with flavors, so feel free to add or substitute ingredients according to your taste!

What to Serve [gluten free snacks] With
Pairing your [gluten free snacks] with the right sides can elevate your meal experience. For a savory option, consider serving these snacks alongside a fresh garden salad with a tangy vinaigrette or a vibrant bowl of homemade hummus. They also complement a chilled beverage or a warm cup of herbal tea, making them ideal for any time of day.
If you’re in the mood for a heartier meal, use these snacks as part of a platter featuring assorted dips such as Greek yogurt mixed with herbs, spicy salsa, or even a zesty guacamole. They also work beautifully as an appetizer at gatherings—imagine an assortment of [gluten free snacks] laid out next to a comforting bowl of soup or a refreshing summer cocktail. The versatility of these snacks ensures that they fit seamlessly into a wide range of dining occasions, enhancing the overall experience without overwhelming the palate.
Top Tips for Perfecting gluten free snacks
To ensure your [gluten free snacks] always turn out perfectly, here are some top tips:
- Use high-quality, fresh ingredients. Fresh almond flour and premium gluten-free oats make a noticeable difference.
- Accurately measure ingredients, particularly when balancing wet and dry components.
- For an extra crunch, lightly toast oats and nuts before mixing them into the batter.
- Avoid overmixing the dough; mix just until the ingredients are combined to keep the snacks light and airy.
- Experiment with spices and herbs. If you enjoy a bit of heat, add a pinch of cayenne pepper; if you prefer a sweeter snack, increase the amount of honey or vanilla extract.
- Always preheat your oven to ensure even baking.
- Let the snacks cool completely before serving; they firm up as they cool, making them easier to handle and even more delicious.
These little tweaks can elevate your [gluten free snacks] from a good treat to an extraordinary culinary experience!
Storing and Reheating Tips
Leftover [gluten free snacks] can be stored with ease. Once they’ve cooled completely, place them in an airtight container and refrigerate for up to five days. If you want to enjoy them later, consider freezing the snacks in a single layer on a baking sheet. Once frozen, transfer them to a freezer-safe container or bag, and they’ll be fresh for up to two months.
For reheating, the best method is to use your conventional oven. Preheat to 300°F (150°C) and warm the snacks for about 5–7 minutes, which will help restore their crispiness. If you’re in a hurry, a microwave can work in a pinch—heat for 15–20 seconds, but be cautious not to overdo it, as prolonged microwaving can make them rubbery.
FAQ
Q: What exactly are [gluten free snacks]?
A: [gluten free snacks] are bite-sized treats made without gluten-containing ingredients. They’re designed to be quick, healthy, and delicious—ideal for anyone seeking a nutritious snack without compromising on flavor.
Q: Can I substitute ingredients to suit my dietary restrictions?
A: Absolutely! You can replace eggs with flax eggs for a vegan option, swap honey with maple syrup, or adjust the spices and herbs to your taste. The recipe is highly adaptable.
Q: How long do [gluten free snacks] last?
A: When stored in an airtight container in the refrigerator, they stay fresh for up to five days. For longer storage, freezing is recommended—they can last up to two months in the freezer.
Q: Are these snacks kid-friendly?
A: Yes, they are! Their balanced flavors and fun textures make them a hit with kids, perfect for after-school snacks or weekend treats.
Q: Can I prepare these snacks in advance?
A: Definitely. Batch-baking these snacks makes them a convenient option for busy days. Simply store them using the guidelines above and enjoy them whenever you need a quick, healthy bite.
Conclusion
There’s something truly satisfying about creating your own [gluten free snacks] at home. From the delightful crunch of freshly toasted oats to the harmonious blend of natural flavors, every bite is a testament to the magic of simple, healthy ingredients. Whether you’re a seasoned home chef or just beginning your culinary journey, these snacks offer a fun, customizable, and affordable way to nourish your body without compromising on taste.
I hope this detailed guide inspires you to experiment in your kitchen and discover your own twist on these delicious treats. So go ahead, preheat your oven, mix up the ingredients, and enjoy the process of making a snack that’s not only healthy but also incredibly satisfying. Happy cooking, and here’s to many delightful, quick, and healthy bites ahead!